
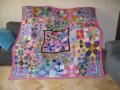
The Farmer's Wife Pony Club Quilt
 01-17-2012, 09:40 AM
#291
Super Member
Join Date: Jun 2010
Location: Hartford, Mo
Posts: 5,783
I mount templates on light cardboard (available at craft stores) use a small 1/8 inch punch on all corners to mark on the back of all fabric used. The 1/4 seam allowance corners on all sides to the template. You do not want to sew pass these dots, especially on Beauty. Laura has provided tips on the right way to assemble each block in her pony book.
A good friend of mine draws with Gel Pens on the back of every fabric piece, reproducing the 1/4 seam line, and uses this in hand quilting. Again, not going pass that connection dot in the corner. I hope this helps you. Good luck; try, try again, and you will get it done and learn more by doing it.
A good friend of mine draws with Gel Pens on the back of every fabric piece, reproducing the 1/4 seam line, and uses this in hand quilting. Again, not going pass that connection dot in the corner. I hope this helps you. Good luck; try, try again, and you will get it done and learn more by doing it.
 01-17-2012, 10:08 AM
#292
Senior Member

Join Date: Mar 2011
Location: Connecticut
Posts: 412
Hello Anael, No, I did not mark the 1/4" seams, I'm using a 1/4" guide. How do you transfer the seam line onto the fabric? Yes, having trouble with the Y seams. Can you tell me the order that pieces are sewn together. I've been putting together the Y seams with the squares, all 4 of them first but how do you attach the middle large square? I hope I've explained this right. Thanks!
01-17-2012, 10:17 AM
#293
Senior Member
Join Date: Mar 2011
Location: Connecticut
Posts: 412
I mount templates on light cardboard (available at craft stores) use a small 1/8 inch punch on all corners to mark on the back of all fabric used. The 1/4 seam allowance corners on all sides to the template. You do not want to sew pass these dots, especially on Beauty. Laura has provided tips on the right way to assemble each block in her pony book.
A good friend of mine draws with Gel Pens on the back of every fabric piece, reproducing the 1/4 seam line, and uses this in hand quilting. Again, not going pass that connection dot in the corner. I hope this helps you. Good luck; try, try again, and you will get it done and learn more by doing it.
A good friend of mine draws with Gel Pens on the back of every fabric piece, reproducing the 1/4 seam line, and uses this in hand quilting. Again, not going pass that connection dot in the corner. I hope this helps you. Good luck; try, try again, and you will get it done and learn more by doing it.
01-17-2012, 11:03 AM
#294
Super Member
Join Date: Jun 2010
Location: Hartford, Mo
Posts: 5,783
Dots are were the lines intersect in a corner. Yes, mark all corners were the lines intersect with a "dot". You can punch a hole in your plastic templates or you can also do what my friend does, and mark the back of all pieces of the block with all the 1/4 seam lines; remember where the lines interect with one another is the "dot" or corner I speak of...hope this helps. Others on QB have also noted to stop on that dot to make the Y seams work right.
01-17-2012, 12:54 PM
#295
Super Member
Join Date: Mar 2011
Location: The Netherlands
Posts: 6,063
Hello Anael, No, I did not mark the 1/4" seams, I'm using a 1/4" guide. How do you transfer the seam line onto the fabric? Yes, having trouble with the Y seams. Can you tell me the order that pieces are sewn together. I've been putting together the Y seams with the squares, all 4 of them first but how do you attach the middle large square? I hope I've explained this right. Thanks!
01-17-2012, 02:49 PM
#296
Senior Member
Join Date: Mar 2011
Location: Connecticut
Posts: 412
I first attached the parts with the Y seams to the middle square (don't sew into the seam!) and then attached the seams of the parts by marking the 1/4"seams and sewing from connection to connection (where the 1/4" seamlines cross). I use an air erasable pen for marking the seams. Don't sew into the seam because you won't be able to make the corner the way it should be. I hope this helps. If not, just ask again.
01-17-2012, 02:53 PM
#297
Senior Member
Join Date: Mar 2011
Location: Connecticut
Posts: 412
Dots are were the lines intersect in a corner. Yes, mark all corners were the lines intersect with a "dot". You can punch a hole in your plastic templates or you can also do what my friend does, and mark the back of all pieces of the block with all the 1/4 seam lines; remember where the lines interect with one another is the "dot" or corner I speak of...hope this helps. Others on QB have also noted to stop on that dot to make the Y seams work right.
Thank you QuiltingNinaSue! I've been practicing using the dots and it really helps so much!
01-17-2012, 04:29 PM
#298
Super Member
Join Date: Jun 2010
Location: Hartford, Mo
Posts: 5,783
Good news. That's the QB way, to help one another. Its alot like the cowboy way that the Night Riders always talked about in their performances. QB helps if you ask the questions, and others who read it, also learn. I have learned so much here from others on QB, doing the Farmers Wife Sampler Quilt, Honchey, (Anne) showed a picture of her Y seam in the Homemaker Block no.47.
01-17-2012, 05:03 PM
#299
Power Poster
Join Date: Apr 2011
Location: Ontario, Canada
Posts: 17,760
Hello Anael, No, I did not mark the 1/4" seams, I'm using a 1/4" guide. How do you transfer the seam line onto the fabric? Yes, having trouble with the Y seams. Can you tell me the order that pieces are sewn together. I've been putting together the Y seams with the squares, all 4 of them first but how do you attach the middle large square? I hope I've explained this right. Thanks!
The others have given you some good suggestions about the "dots" and not sewing to the end of the seams when doing a Y.
Re what order to sew ... look at the picture in the book and it will show you. If there's no gaps, then you can join them in whichever order you wish. Then, add on the next pieces that have the narrowest gap shown. Then the next narrowest. And so on, until all are joined.
If PPing, the numbers are on each section as to which order you add the fabrics. Then you pretty much figure out which order to join those sections.
01-17-2012, 05:14 PM
#300
Super Member
Join Date: Mar 2011
Location: The Netherlands
Posts: 6,063
HI Again, First, I make all 4 of the Y seam sections. Then do I attach each section to the middle square and stop the seam 1/4" before the end like I did when I made the Y seam sections? That way the Y seams match and the corner of the square fits in between. Hope this makes sense. I think I'm getting it slowly but surely. Thank you!!!!

Thread
Thread Starter
Forum
Replies
Last Post
ladydukes
Main
3
09-06-2015 08:55 AM
