
IceLeopard Insanity 2: the return
 10-14-2020, 07:00 AM
#31
Super Member

Join Date: Dec 2010
Location: Portage, Michigan
Posts: 7,606
Well, I have changed my mind about fabric choices way to many times. This is it. No more changes.Trying to pick from stash and also meet fabric requirements. HST later today and then wait for Friday's next step. It feels good to be ready to go.
It feels good to be ready to go.
 10-15-2020, 05:44 AM
#33
Super Member
Thread Starter

Join Date: Mar 2016
Posts: 1,348
Well, my PC is back, but I'm still without internet on it. But do not despair! I hooked the tablet up to the PC and transferred the images that I wanted to use. So unless I lose this tablet or do something dumb like drop it in the bathtub, everything is on it.
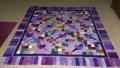
Week 2 - QSTs. 48 in brown/cream/teal. Finished size will be 3 inches.
This week is for quarter-square triangles. Some people call them hourglass blocks, but since this is also used for a different block, I�ve given you a picture. The east and west quadrants need to be teal/turquoise. North is chocolate brown, south is cream. (Remember these are my colors. Use your own choices.)
To make 48 units, cut twenty-four 4 1/2-inch squares of turquoise, twelve of brown, and twelve of cream. On the turquoise squares, mark a diagonal line from corner to corner. Layer half of the turquoise squares on cream squares, right sides together; sew 1/4 inch on both sides of the marked line. Cut along the line and press the resulting half-square triangles. Press to the turquoise side. Layer the remaining turquoise squares on brown, right sides together, and repeat marking, sewing, cutting, and pressing.
Mark the turquoise/cream HSTs with another diagonal line. Take one of the turquoise/cream HSTs and layer it right sides together with a turquoise/chocolate HST. If you�ve pressed to the turquoise side, the seam lines will nest. Make sure that your turquoises are not on top of each other! Sew 1/4 inch on both sides of the marked line. Cut on the line and press your QSTs. If you like, you can spin the seams so they will lie flatter.
If you measure them, you�ll see that they are a bit over 3 1/2 inches and they may be a bit wonky. That�s OK, because this next step is trimming them down to an exact 3 1/2 inches. Line up one of the diagonals of your QST to a diagonal on the ruler and make sure that the center is at 1 3/4 inches. Trim top and side. Rotate the unit 180 degrees, keeping the same diagonal lined up with the ruler line, the center on the 1 3/4 mark, and the first trimmed edges on the 3 1/2 inch mark. Again trim top and side. You may not be trimming more than a couple of threads, but now your units are the exact size and all the edges are square.
10-15-2020, 03:32 PM
#36
Super Member
Join Date: Dec 2010
Location: Portage, Michigan
Posts: 7,606
Looking forward to seeing some examples of HST and QST later from all.
 10-15-2020, 04:39 PM
#37
Super Member
Thread Starter
Join Date: Mar 2016
Posts: 1,348
I figured out how to post the picture and got so pleased with my own brilliance that I just *had* to post it right then.
So yes, this should have been posted tomorrow. Y'all just have an extra day now.
10-16-2020, 12:41 PM
#38
Super Member
Join Date: Jan 2011
Posts: 2,047
Thank-you IceLeopard for doing this for us!!!! I�m seriously thinking of joining in on this one. My 1st thought on colors: cream; greens; turquoise/blues/dark (scrappy); & dark brown. I�ll check this weekend for my stash colors and wash the fabrics. I�m just going to do a throw size. I so love mysteries and QAL�s.
10-17-2020, 05:15 PM
#40
Super Member
Join Date: Dec 2010
Location: Portage, Michigan
Posts: 7,606
Nrryan49, Here are the directions I use to upload a photo. Most often problems occur when the photo is too large or in step 5. Other folks go about this differently, but here is one that works for me.How to upload a photo to the Quilting Board
1. Write message
2. Click "Go Advanced"
3. In the box labeled Additional Options click "Manage Attachments"
4. Click "Browse" and locate your photo wherever you saved it on your computer.
5. Find the photo you wish to post click save and then upload. ***
This seems to be where folks stumble. The little box with the "Browse" button needs to be expanded so you can see the "Upload" button. It is on the far right and hidden until you expand the box. Just slide the right side of the box to the right ti see the "upload" button.
6. Preview Post and make changes if you wish or add an additional photo.
7. Click "Submit Reply".
**** I save my photos in a quilt photos file by year, but I also keep a second copy in a file where the photos have been resized to "medium". It this format will allow you to post to the QB. It seems there are multiple ways to do this and it all depends on your computer and software preferences. I
Hope this helps. It took me way too long to figure this out but now it seems to work well for me. Hope it will work for you too.
