
Hanging storage pods and curved cutting lines
 10-10-2023, 08:46 AM
#1
Junior Member
Thread Starter
Join Date: Feb 2016
Posts: 201
I want to order the pattern for and make some hanging storage pods such as are seen here.
https://www.e-quilterscorner.com/sho...-x48930990.htm
I'm having a problem though because it looks to me like the cutting line would not be a nice straight line, but rather a curverd line. If I have a paper pattern for this (and I'm assuming it's a paper pattern that comes with it), I would think that after a few cuts the paper pattern would no longer be nice and crisp and there would be several places where the cuts weren't make exactly how they should be. In short, a paper pattern would be good for only so long.
How does one get around this? If the pattern were all straight lines it would be easy to figure out where to cut with a ruler or if the pattern were a hard plastic template it would be easy to trace around without damaging it. How does one handle curved lines?
I hope what I'm asking makes sense!! I have enough troubles cutting a straight line with a rotary cutter so I can only imagine how I'll do with these. But I love the look of them and think they would make great Christmas gifts.
 10-10-2023, 08:49 AM
#2
Super Member
Join Date: May 2011
Location: Pacific NW
Posts: 9,490
I copy almost all my patterns onto freezer paper, partially to preserve the integrity of the pattern, but mostly because I much prefer ironing the pattern onto the fabric, vs pinning the pattern to the fabric.
 10-10-2023, 10:44 AM
#4
Super Member
Join Date: Apr 2018
Location: NW MN lake country
Posts: 3,552
I either print out a paper copy of my pattern when I get it or trace the pattern onto wax paper so my original is never used for cutting. If my copies should get too worn, I have the original to copy and start again. For most projects, I prefer wax paper to copy paper as a roll of wax paper is inexpensive, and allows me to clearly see the fabric underneath so any stripes are straight or motifs are centered. If I think that I will be making many multiples of an item, I make a clear template plastic pattern and trace my patterns onto fabric. When I have curved or irregular shapes, I always cut with a scissors or shears as it is easier for me to cut accurately than with a rotary cutter.
10-10-2023, 09:32 PM
#7
Super Member
Join Date: Aug 2015
Location: Michigan
Posts: 1,297
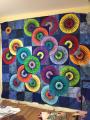
I made this pattern. The darts were straight lines. After sewn they make the edges rounded. Seems like there were 3 or 4 for the top of the basket and the same for the bottom. So both the top and bottom look curved. The way the top edge has a higher back with a lower front makes it a wonky pattern to cut out. Turned out cute. Good luck.
10-11-2023, 02:28 AM
#8
Senior Member
Join Date: May 2022
Location: Northeast
Posts: 682
I dispise those thin, wisps of paper patterns when making clothing or something like you want to make. What I do with the patterns that I know that I will be making more than one of, is to cut the pattern out in cheap muslin fabric or scrap fabric that I have. (Lots of time I'll buy fabric I don't really care for to use in a quilt, at a yard sale for a 1.00 and keep it for this purpose)
Then I take some Ultra Firm Pellon 71F one side fusible and iron the cut out cheap fabric on to it. It gives me a stiff pattern that I have that can be cut out time and time again and I can write/transfer all of the markings onto the muslin/scrap fabric that I need as well. Then I put the actual paper pattern away in case I need to make another working copy for some reason.
Lots of times if I need two different sizes, I'll make one like this in the larger cut of the paper pattern, then cut the paper pattern to the next size I need and make one of the smaller size as well.
Last edited by quiltsfor; 10-11-2023 at 02:30 AM.
