
What can I demonstrate at a quilt exhibition--?
 11-27-2014, 12:51 AM
#21
Super Member
Thread Starter
Join Date: Jul 2010
Location: England, U.K.
Posts: 1,589
Thank you all so much for your answers to my question. I think that the binding seems to be favourite - so I am going with that. I am not very good at machine or hand quilting - wish I was - so that is - I am afraid not an option ! Anyway thanks again.
 11-27-2014, 04:36 AM
#23
Super Member

Join Date: May 2008
Location: Louisiana
Posts: 6,764
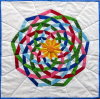
Quiltlove, I would like to see a demonstration of the quilt in your avatar. I love that design and just can't get that set of directions wrapped around in my head. But...I also agree that mitering corners for borders, bindings, etc. would be a good idea.
11-27-2014, 05:08 AM
#24
Super Member
Join Date: Jan 2014
Location: Central NM
Posts: 1,600
http://pir8.freeservers.com/quilting...ding/index.htm
I would do a demo on ending quilt binding. I did this at a retreat and the gals were thrilled!! Just a suggestion.
I would do a demo on ending quilt binding. I did this at a retreat and the gals were thrilled!! Just a suggestion.
11-27-2014, 07:28 AM
#25
Super Member

Join Date: Jun 2010
Location: Clinton, OK
Posts: 1,736
The ONLY way I ever figured this out was to take a class... so this is what I would demo! Now for me, a binding is a "piece of cake!" So I agree with JanRN... demo how to do the binding!
11-27-2014, 09:57 AM
#26
Super Member
Join Date: Jul 2010
Location: Central Willamette Valley, Oregon, USA
Posts: 7,695
Joining of ends on binding is my specialty. I've demo-ed it several times.
*First join all binding strips, and lay the binding on the quilt so that you don't get seams too close to a corner.
*Press a triangle into the beginning. When it's on the quilt, turn down the top edge so that it is even with the raw edge on the side. Crease this well or draw a line on that crease so you can see it.
*Start sewing on the binding about 8 to 10 inches from this triangle. Leave that tail free.
*Now go back and put a pin in the quilt about 16 to 20 inches from where you started sewing. This is where you will stop at the end. (I'm not going to go through how to do the mitered corners here.)
*Sew around to the pin. Take the quilt out of the machine.
*Pin binding as you will want it to lay. Snug it up a little. Now ends of binding are overlapping.
*Cut off the end of the binding at the bottom of the triangle. The two pieces will be overlapping exactly as long as the binding is wide. It doesn't matter how wide your binding is. The triangle will be the correct measurement.
*Take the pins out. Pick up both ends RST. Find where the crease of the triangle is and twist these two pieces so that the crease is going side to side, not top to bottom. Pin very well.
*Sew on the crease.
*Snap the quilt straight and see if the binding fits now. If you sewed top to bottom, it won't work. Frog stitch and do it again. Sometimes that happens.
*Finger press the seam open. Then trim out the seam allowance.
*Carefully fold the binding in half with the seam allowance still open.
*Sew this last piece of binding onto the quilt.
It will be very hard to see where your binding was sewn together. That seam looks exactly like any other seam in your binding.
Hope this works for you.
 11-30-2014, 09:01 PM
#29
Super Member
Join Date: May 2012
Location: Central Wisconsin
Posts: 4,391
These are excellent instructions, really well written thank you. The only thing I will add is that when working with bias binding, when I cut the second piece of the binding after it is ready to connect the ends, I cut the second piece about a quarter inch shorter than on straight binding to prevent puckers when I sew it down. Bias edges are stretchy so I take a little extra off so that it lays perfectly smooth. Works every time.

Thread
Thread Starter
Forum
Replies
Last Post
lonetalisman
Offline Events, Announcements, Discussions
0
01-18-2011 10:24 AM
Rowan8
Offline Events, Announcements, Discussions
0
09-17-2010 11:43 AM
AtHomeSewing
Links and Resources
21
02-02-2010 06:35 AM
mamatobugboo
Links and Resources
0
07-29-2009 05:26 AM
