
I like to peep in windows. (Attic windos)

 07-30-2013, 04:32 AM
#74
Super Member
Thread Starter
Join Date: Apr 2011
Location: Midwest
Posts: 5,051
No "pattern" per se. After I cut the panel border off ,yes, there was a red frame/border on the original panel. Measure the piece. I just cut the panel in half-Vertically. I divided and cut the panel in thirds width -wise. 2 blocks. across, 3 blocks down. (Use your judgement for what you want to do with your large print fabric or panel.)
I just use a dark strip for the vertical strip. Use a light strip for the horizontal. Assemble the attic window block. Add a thin strip of the dark fabric and sew it the length of the horizontal on the bottom of the finished block. On my project, Each focal print "window scene" block is approximately 12" tall, 10" wide. The window pane strips are 2 1/2" wide. The bottom thin strip is cut 1". Once all of your blocks are done, you assemble the "rows" vertically vs. the usual Horizontally. Top to bottom rows. Then sew the vertical rows together. I added a final 2 1/2" strip f the light fabric to the bottom of the project to give the illusion of a window sill.
Frame your project as desired.
As another post suggested, experiment with different strip widths of "panes" specific to the size of the focal print that becomes your view. See what appeals to your eye.
I hope that these instructions make sense. IF I have time to make a tutorial with photos, I will post it in the tute section. Probably wont happen till the weekend tho. I will let you know .
Sandy
Another project using a large print. Not a panel. 24" repeat.
http://www.quiltingboard.com/picture...w-t207503.html
Last edited by Sandygirl; 07-30-2013 at 04:39 AM.
 07-30-2013, 06:21 AM
#76
Super Member
Thread Starter
Join Date: Apr 2011
Location: Midwest
Posts: 5,051
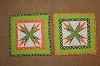
Use those pre printed blocks up! Another project.
http://www.quiltingboard.com/picture...s-t207659.html
Enjoy!
Sandy
http://www.quiltingboard.com/picture...s-t207659.html
Enjoy!
Sandy


Thread
Thread Starter
Forum
Replies
Last Post
