
mitering borders
 07-26-2013, 11:38 AM
#1
Super Member
Thread Starter

Join Date: Aug 2010
Location: Texas Gulf Coast
Posts: 1,463
I just finished a top that simply HAD to have mitered borders.
Here's the thread with info about the quilt. http://www.quiltingboard.com/picture...w-t226587.html
I've tried to do these before, but always chickened out. The biggest problem is the how-to videos use teeny-tiny examples to show how to do this, but this time I just plunged in and did it. They are right when they say it's just not as hard as it would seem.
My biggest piece of advice is on the larger quilts you really don't have to fold the entire quilt on the diagonal to get the miter right. If your border pieces are lined up and the corner you are dealing with is at a good folded point then you are good to go.
I looked at every video I could find, but this was the one I looked at just before trying to do it.
http://www.bing.com/videos/search?q=...a+quilt+border
My pictures have been coming out fuzzy and upside down - wish me luck!
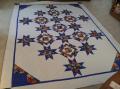
The blue/yellow one was my practice quilt. Of the 8 corners I have now mitered I had to rip one to line it up better. The blue/yellow one had a scrappy border and even though the miter is fine it looks funny in places when the corner ended up having a little bit of one fabric instead of having just one - or two - fabrics in the corner. The last pic shows what I mean. So .. you really CAN do this!
Here's the thread with info about the quilt. http://www.quiltingboard.com/picture...w-t226587.html
I've tried to do these before, but always chickened out. The biggest problem is the how-to videos use teeny-tiny examples to show how to do this, but this time I just plunged in and did it. They are right when they say it's just not as hard as it would seem.
My biggest piece of advice is on the larger quilts you really don't have to fold the entire quilt on the diagonal to get the miter right. If your border pieces are lined up and the corner you are dealing with is at a good folded point then you are good to go.
I looked at every video I could find, but this was the one I looked at just before trying to do it.
http://www.bing.com/videos/search?q=...a+quilt+border
My pictures have been coming out fuzzy and upside down - wish me luck!
The blue/yellow one was my practice quilt. Of the 8 corners I have now mitered I had to rip one to line it up better. The blue/yellow one had a scrappy border and even though the miter is fine it looks funny in places when the corner ended up having a little bit of one fabric instead of having just one - or two - fabrics in the corner. The last pic shows what I mean. So .. you really CAN do this!
Last edited by JanTx; 07-26-2013 at 11:43 AM.
 07-26-2013, 11:50 AM
#3
Super Member
Thread Starter
Join Date: Aug 2010
Location: Texas Gulf Coast
Posts: 1,463
What is getting to me is that when I put it on my bed to see how it would look I realized that the corners won't even be seen! Grrr! I'm not sure if the lady this was made for has a footboard or not. If so they will be invisible beautiful mitered corners!
07-26-2013, 12:06 PM
#4
Super Member

Join Date: Oct 2011
Location: San Diego
Posts: 1,200
I agree mitered corners aren't that hard. Yours are extremely well done! But I messed up on a recent quilt that had several borders because the top and bottom borders were not the same width as the sides, so they didn't match up. Lesson learned.
07-26-2013, 12:25 PM
#5
Super Member

Join Date: Mar 2009
Location: FL
Posts: 7,084
Your miters came out perfect! What I do when I do mine is to sew the 4 borders like in the video, but then I lay the corner out on the ironing board and over lap the pieces, then I fold one back to 45 degree angle and glue baste it, then I open it up, pin it well and sew on the crease. After I sew it and check it to be sure it lines up, then I trim it. Works perfect for me. 
 07-26-2013, 06:43 PM
#9
Super Member
Join Date: Aug 2010
Location: Tampa Bay Area, Florida
Posts: 2,229
Eleanor Burns has a clear explanation in this video http://quiltinaday.com/theater/2800Series/2803.html on mitering borders. Great job on yours!!

Thread
Thread Starter
Forum
Replies
Last Post
Gayle8675309
Main
11
01-15-2014 07:07 AM
