
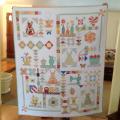
Playing with strips and scraps, this is what I did today!
 07-07-2018, 09:45 AM
#21
Super Member
Join Date: Jan 2011
Location: Cottage Grove, MN
Posts: 2,809
Looking good! I just finished putting together some strips that were approximately 6" long and between 1 and 2 inches. I have a little iron by my sewing machine and turned on the steam and ironed each seam when I finished sewing it. I made each length about 12" and that worked with my strip cutting ruler so I could trim all pieces to 6" width without folding over my strip. I found that I had more trouble keeping the row straight if I ironed the sewn strips at the end. I did not use foundation piecing either.
I just threw away several patterns that were in a donation. That is a great idea though.
I just threw away several patterns that were in a donation. That is a great idea though.
 07-07-2018, 10:07 AM
#22
Super Member
Join Date: Apr 2016
Location: Blue Ridge Mountians
Posts: 7,075
Keep it up. You are doing a fantastic job. I do use a foundation when I string/crumb piece. Usually cheap cheap thin muslin. The kind you can see through. I sew and flip and elmer's school gluestick it down, sew the next piece and then Iron when it is all done and trim to the size I want.
 07-08-2018, 04:36 AM
#25
Power Poster

Join Date: Jul 2010
Location: PA
Posts: 10,703
07-08-2018, 03:17 PM
#26
Super Member
Join Date: May 2012
Location: Central Wisconsin
Posts: 4,391
 07-09-2018, 02:56 AM
#29
Super Member
Join Date: Aug 2013
Posts: 9,299
Somebody discovered the addiction of string piecing! Looking good.
I don't see any problems, although like others have said, you might like your results better if you use a foundation.
I have drawn a template for a 6.5" block with lines to mark various widths, and made copies on computer paper. While it's thicker, I haven't had a problem tearing away (use a tight stitch like 1.8.).
My only bennysugg (never heard that term but I'm gonna adopt it!) -- and I only mention it from experience-- is to make sure that none of your end pieces are skinny. By the time to sew your seam allowances, a skinny piece that loses 1/2" is much skinnier and looks awkward. I don't see any of yours like that, though.
07-09-2018, 06:07 PM
#30
Power Poster
Join Date: Jul 2009
Location: Between the dashes of a tombstone
Posts: 12,716
My suggestion is to spray them with plain water...I use an old starch bottle for my water. Then press. Some of these may already have been starched so why add more. You can use a cotton pressing cloth as well. Good luck...some day I will show mine...life's been getting in my way here.

Thread
Thread Starter
Forum
Replies
Last Post
leatheflea
Pictures
8
08-25-2011 06:36 PM
