
Dresden Plate Spring challenge 2021
 04-17-2021, 04:14 PM
#41
Super Member

Join Date: Jul 2013
Location: South Dakota
Posts: 8,147
Here is what I worked on today - Not sure what I want to put for centers yet.
I plan on doing all my applique by machine with a narrow zigzag with invisible thread. I've been doing that quite a bit and like the results. I don't have any trouble stitching by hand, but I don't like how long it takes. Rather do it by machine and be done and on to the next fun. Beside, I'd rather do cross stitch or hand embroidery if I'm going to hand stitch.
BTW - these three are sort of a set. I sewed the WOF strips and got 20 wedges, and used half on one circle and half on the other. I did make them so that I removed the inner piece on both, so that is why one has the gold and the other does not.
Then I cut WOF of the two solid petals, and got 20 of each, so used 10 on each of the mixed petals, and sewed the remaining 10 each into pairs to make the plate with the larger points. Next I'll play with rounded petals.


 04-26-2021, 01:37 PM
#45
Senior Member
Thread Starter
Join Date: Jun 2011
Location: Ontario, Canada
Posts: 305
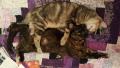
Okay I've progressed quite a bit and am happy with where I am at. I stitched the plates on the the background block and then added sashing with cornerstones. I found the cornerstones came together quite easily and will try that technique again. Here is a picture, show casing Cadbury Cream Egg. The quilt is actually 3x3 but I have two kittens and when they saw me lay the quilt down out they assumed it was a new toy and this was the only picture I could get! lol I'm going to use the blue for a border but not sure if I want to do just blue or something more.
04-26-2021, 02:03 PM
#46
Super Member

Join Date: Nov 2010
Location: Mars
Posts: 2,549
Your sunflowers are SO pretty, Lizzie3!  Your kitten is cute, too.
For what it's worth, there's no indication that you had any trouble at all with your circles, or that your plates aren't nice and flat. Good job!
Next time for your circles, instead of pinning the circles on, you could press your plate and circles very flat, then apply Elmer's Purple School Glue stick to the back of a circle and position it on your plate, pressing well to set the glue.
It's fairly easy to remove the circles and reposition if you want to, you can iron right over a blob of wet glue and it won't stick to your iron. No pins to sew around and pucker up your fabric. I buy these glue sticks by the case - I use them for every kind of basting in quilting and apparel sewing. (Not so much for bags - I use Fabri-Tac for that because bag material are sturdier and pull apart easier.) But, it's really great stuff for applique, in particular - and I use two or three tubes of it to baste the binding on the quilt, first the front, then the back. They should give me rebates.
Congratulations on a CUTE Dresden top!
Your kitten is cute, too. For what it's worth, there's no indication that you had any trouble at all with your circles, or that your plates aren't nice and flat. Good job!
Next time for your circles, instead of pinning the circles on, you could press your plate and circles very flat, then apply Elmer's Purple School Glue stick to the back of a circle and position it on your plate, pressing well to set the glue.
It's fairly easy to remove the circles and reposition if you want to, you can iron right over a blob of wet glue and it won't stick to your iron. No pins to sew around and pucker up your fabric. I buy these glue sticks by the case - I use them for every kind of basting in quilting and apparel sewing. (Not so much for bags - I use Fabri-Tac for that because bag material are sturdier and pull apart easier.) But, it's really great stuff for applique, in particular - and I use two or three tubes of it to baste the binding on the quilt, first the front, then the back. They should give me rebates.
Congratulations on a CUTE Dresden top!
04-27-2021, 09:09 AM
#47
Super Member
Join Date: Jul 2013
Location: South Dakota
Posts: 8,147
Those sunflowers are very pretty!
I'm another that uses Elmers washable glue. I've used a couple of other "generic" brands but find Elmer's is softer and works much better. It also seems to release easer when I need to remove something. I even use it to stick my fabric down to the stabilizer when doing machine embroidery (I don't hoop the fabric, just the stabilizer).
For the plates - a trick I do is sew them in quarters, so if I've got 20 petals, I sew them into groups of five. Then I square them up which helps take out any excess in the middle so they lay a lot flatter. I've been using the appliquik method for the circles, and just ordered the larger size "perfect circles" so I'll have heat resistant templates.
I cut out the fabric 1/2" - 3/4" larger than the template, then use washable glue and put a spot on to hold the template in place. I take a dry iron and press the excess fabric over the edge, maybe by 1/8" to 1/4". I do not try to iron the excess flat, I'm just pressing a firm crease in all around the edge. Then I remove the template and trim the allowance to a scant 1/4". It's much easier to press with enough fabric to hang on to, and trim afterwards.
Then I use the small glue pen that the appliquik uses (though a cheaper brand) and use pointed tools to glue the pressed edge down, working in the excess fabric. Once done I press it good and starch it (about the only thing I use starch for.
Then I lay out the plate and press it again so it's good and flat, get the circle in the right spot, and flip over a spot on the edge and glue, and work my way around the edge. I sew them on by machine using a narrow zigzag and invisible thread.
I finished all the plates for the RR quilt , and have them sewed to the corners so the next step is sewing the corners to the quilt (I turned it on point). I'll share pictures when that is done.
I'm looking forward to starting my Dresden Plate/Doily quilt top. I have a spot in my office where I can hang a 60x60 quilt, so that is what I'm going to aim for.
04-27-2021, 11:12 AM
#48
Super Member
Join Date: Nov 2010
Location: Mars
Posts: 2,549
04-27-2021, 03:45 PM
#49
Senior Member
Thread Starter
Join Date: Jun 2011
Location: Ontario, Canada
Posts: 305
Aww thanks for the positive feedback on my flowers. I am easy going (at least when it comes to my quilting) so even when it's imperfect I still love it.
But I like to improve so I'll try the gluing method for next time and follow all of your advice and bookmark this thread!
I am easy going (at least when it comes to my quilting) so even when it's imperfect I still love it.But I like to improve so I'll try the gluing method for next time and follow all of your advice and bookmark this thread!
