
On Ringo Lake -- Bonnie Hunter Mystery Quilt 2017-18
 12-08-2017, 12:49 PM
#921
Super Member
Join Date: May 2013
Location: Ballwin, MO
Posts: 4,269
I'm feeling a little consternation after seeing this clue! I think I'm having a problem with my pressing method perhaps stretching or making my pieces misshapen. Can you tell me your best method? I've been finger pressing, then pressing with an iron. I know some people turn the unit over and press from the backside, making the seam go one way or the other, then flipping it over and pressing the front, but I have troubles with getting the seam to open enough when pressing from the back, and therefor stretching when I repress from the front. Is that clear as mud? I've been paying attention to starching, cutting, making sure my seams are 1/4", and yet I get wonky. Maybe it's just me? Does anyone have any suggestions? Thank you in advance.
Theresa, what ways have you tried? Is the method Bonnie labeled 'the Bonnie method' the same as the no-waste method?
 12-08-2017, 01:20 PM
#922
Senior Member

Join Date: May 2017
Location: Mount Pleasant, WI
Posts: 579
I have tried Bonnie's method, only I have an Easy Angle instead of hers with the red line - block too small
I tried the trim away the square into a triangle - block too small
I tried making up templates, can't figure the math - block too small.
This has given me a major headache. I had a TBI last summer and this kind of calculating just scrambles my poor scrammbled brain:-(
eta: had to remove some major whinning.
12-08-2017, 01:30 PM
#923
Super Member

Join Date: Sep 2014
Location: Rural Oklahoma
Posts: 5,374
How did you make your template? There should be no real math w/ it. Draw a rectangle 2 x 5 inches. Place your two diagonal lines at 45 ' angle. Then add the 1/4 inch seam to the outside of each of those diagonal lines. Cut around all the outer lines in the shape of a parallelogram.
12-08-2017, 02:22 PM
#924
Power Poster
Join Date: Jun 2010
Location: New York
Posts: 17,564
I enjoyed all the comments and can relate. This should be fun! Christmas cards are all mailed but Christmas cookies have to be baked and mailed...will have to make these units in my sleep 
NZquilter I enjoyed looking at your unit, so pretty and those adorable HST.
NZquilter I enjoyed looking at your unit, so pretty and those adorable HST.
12-08-2017, 02:37 PM
#925
Super Member

Join Date: Jul 2013
Location: Georgia
Posts: 8,154
This is how I cut mine. I did a whole boatload of these for my ribbon quilt - so I've had quite a bit of practice already.
I cut the strips, then use the Easy Angle to cut the point off.
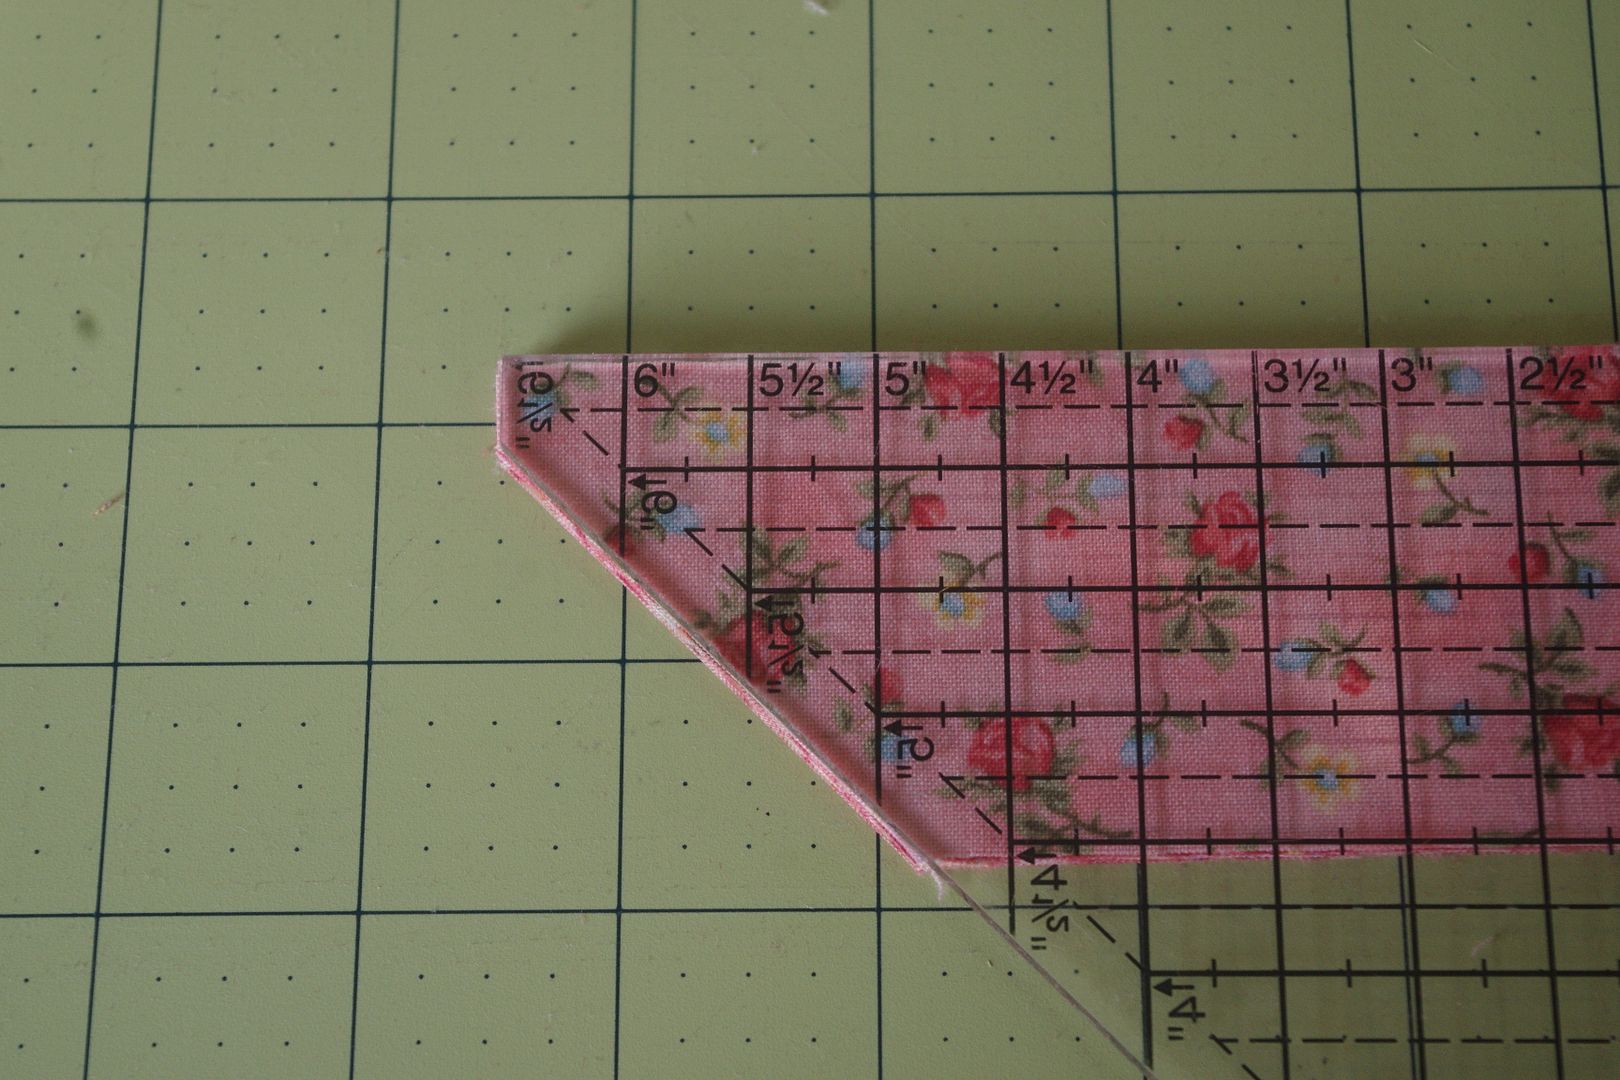
Then I line up where the 5" is and cut the slant. Then I cut the point off and move on down until I've got the strip done. For this I have 6 layers. I don't go over 6 and prefer to keep it more around 4-5.
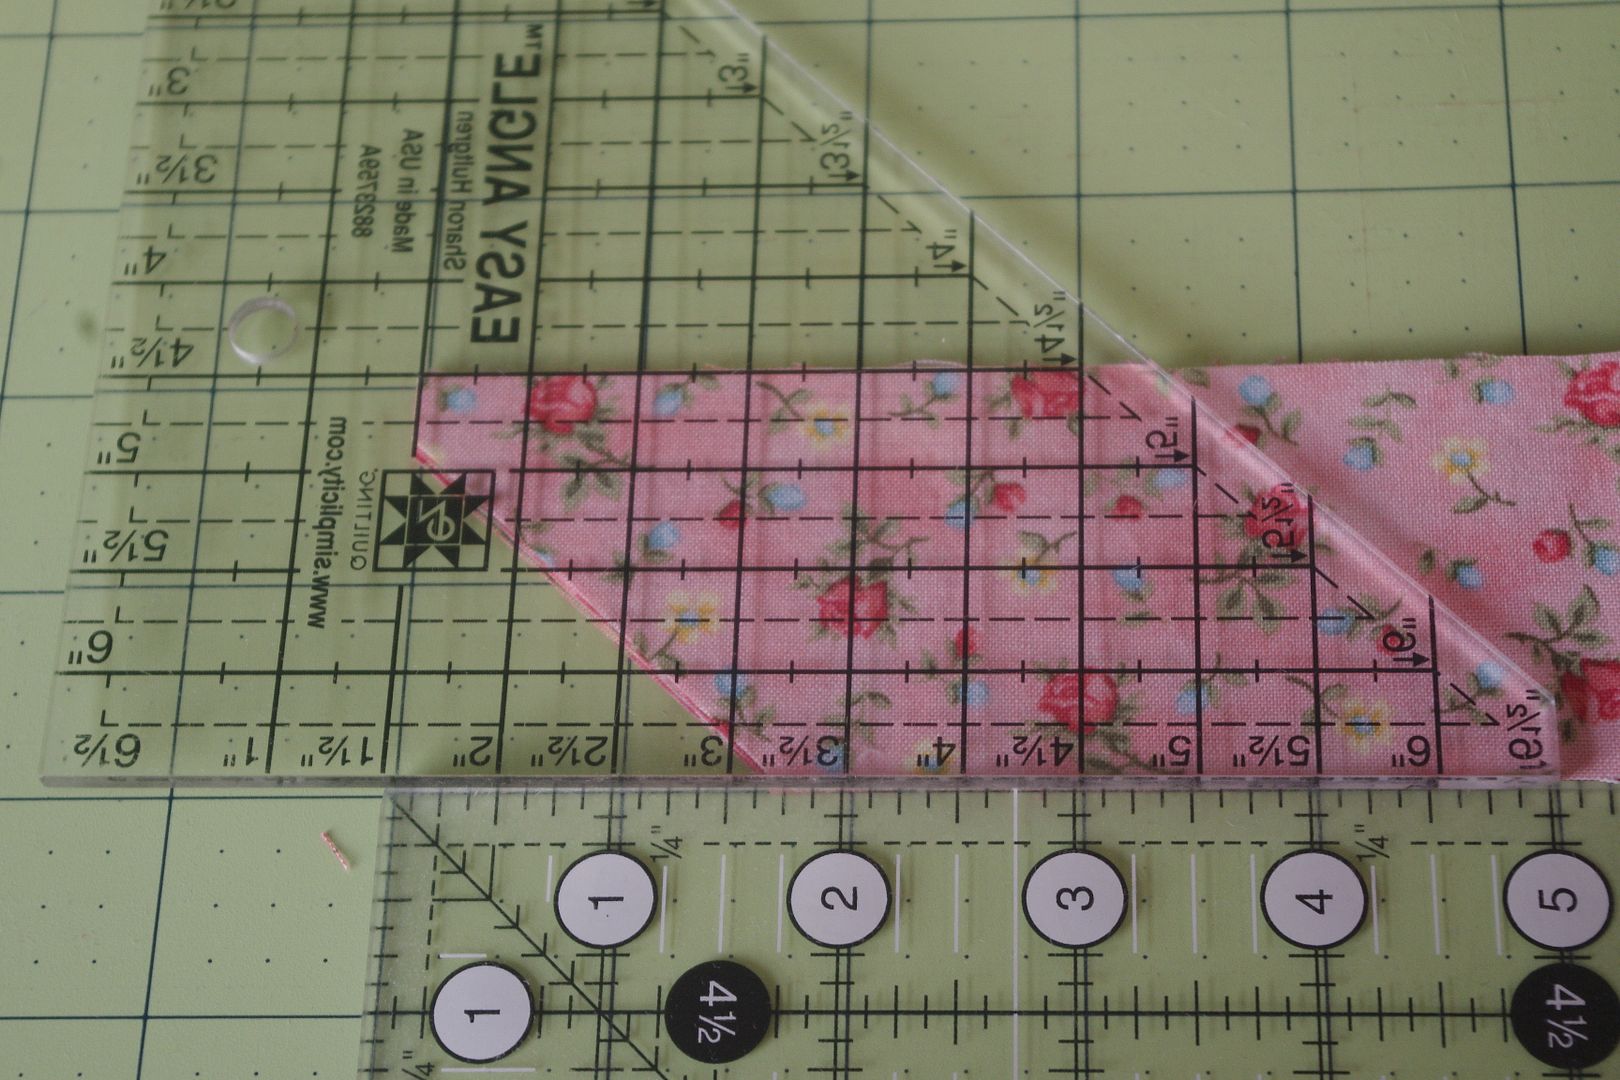
These were cut from FQ, so not real long. I did half right side up and half wrong side up, so I did not have to change the way I was laying my ruler.
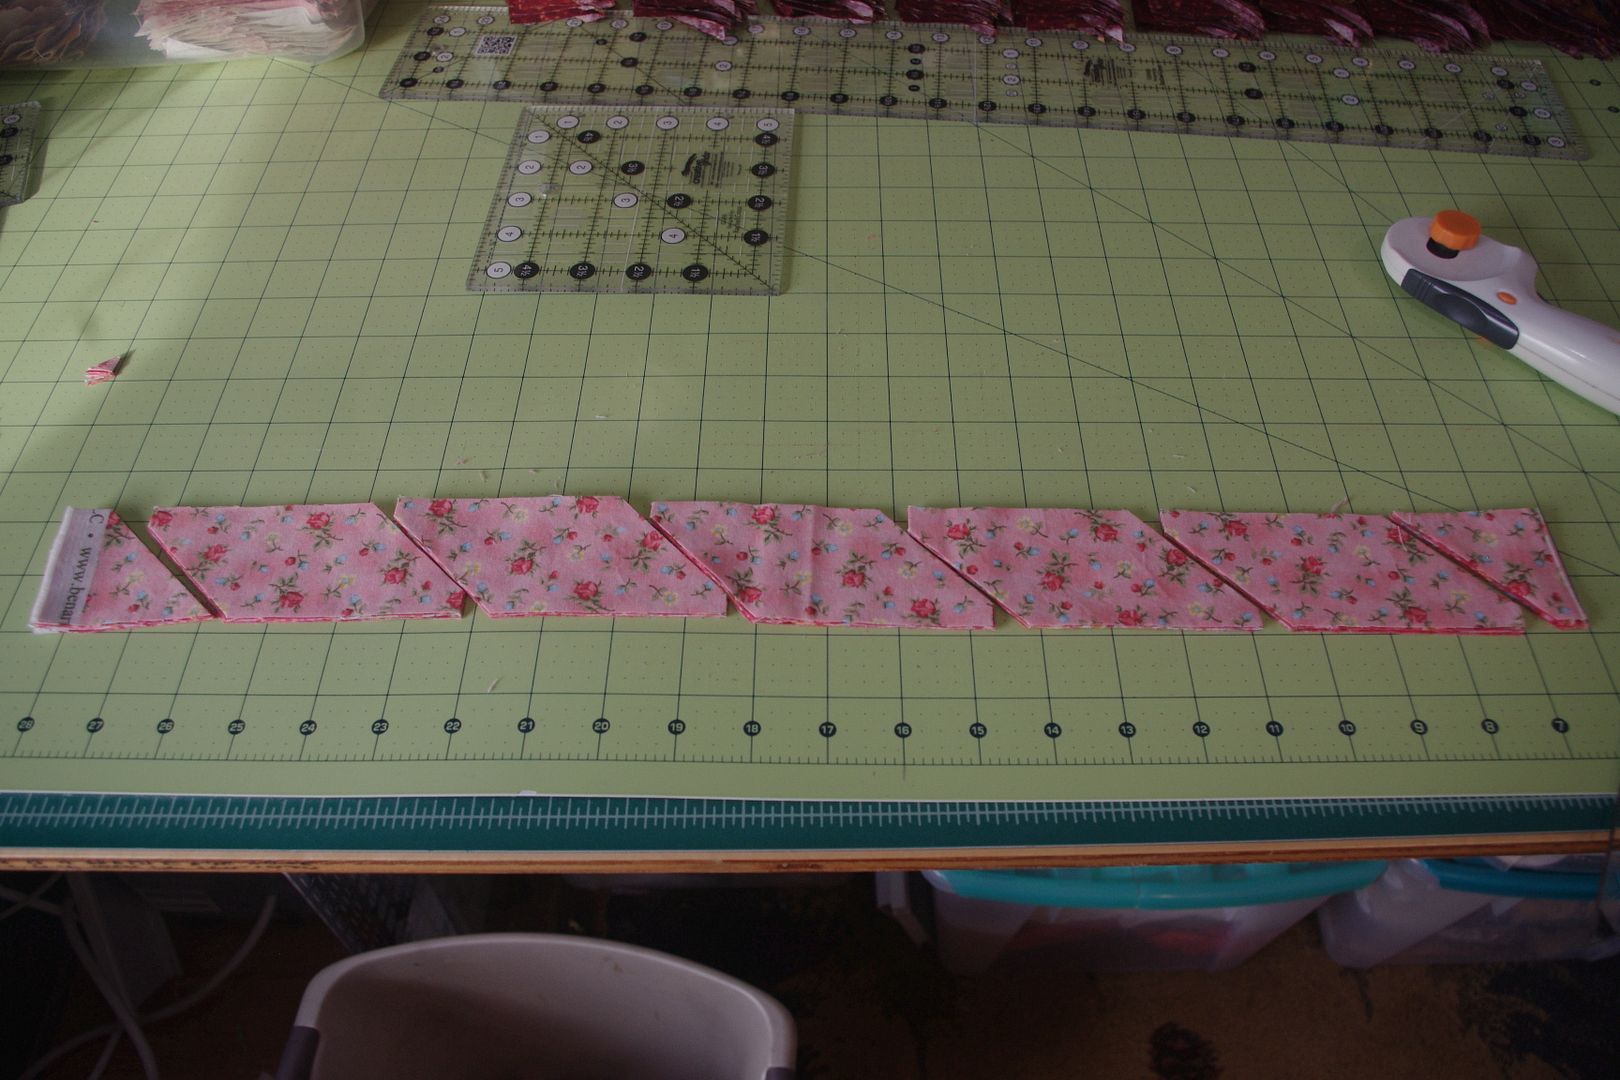
When I'm cutting up the strips and need to have my ruler off the edge, I put the cut off pieces down so I can use them to rest the ruler. Since I hast three WOF groups (6 fabrics each) to cut up, I left them there from the first row until I was done.
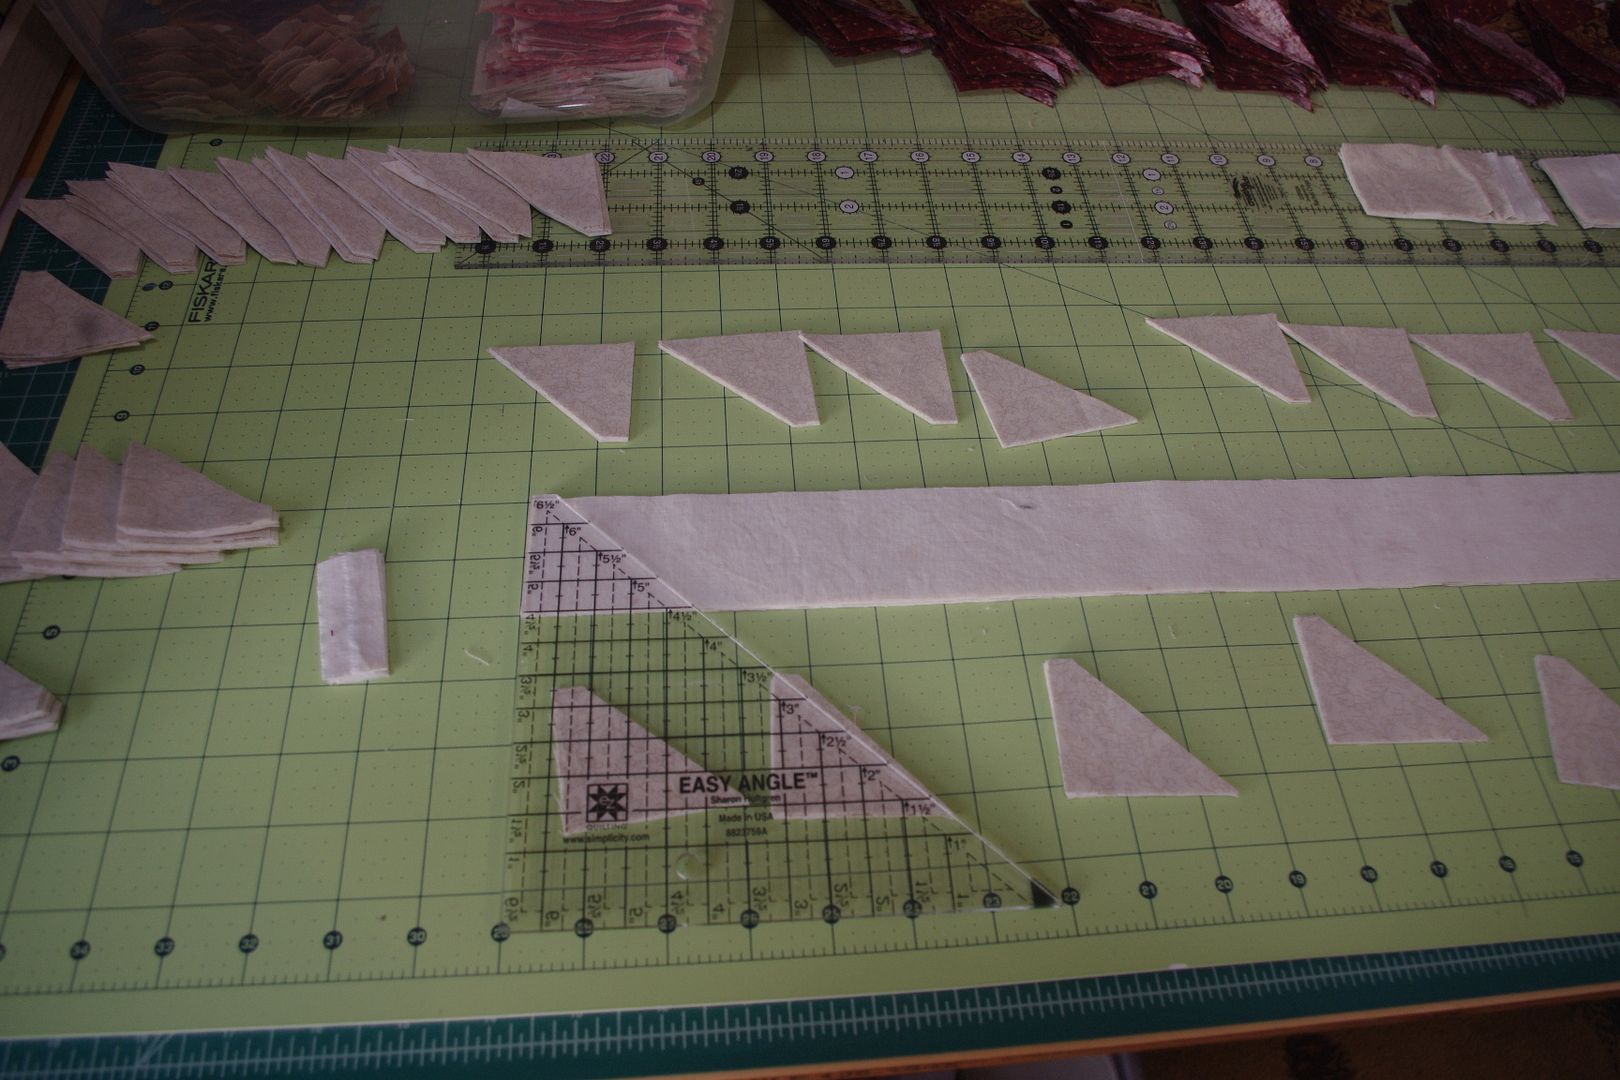
Some mentioned having problems using the companion angle for the flying geese. On problem I had was wanting to line up the top instead of the bottom when cutting. The strips end up being a hair wider than 2", so you'll get a bit different bottom width depending on what you do.
Bottom lined up
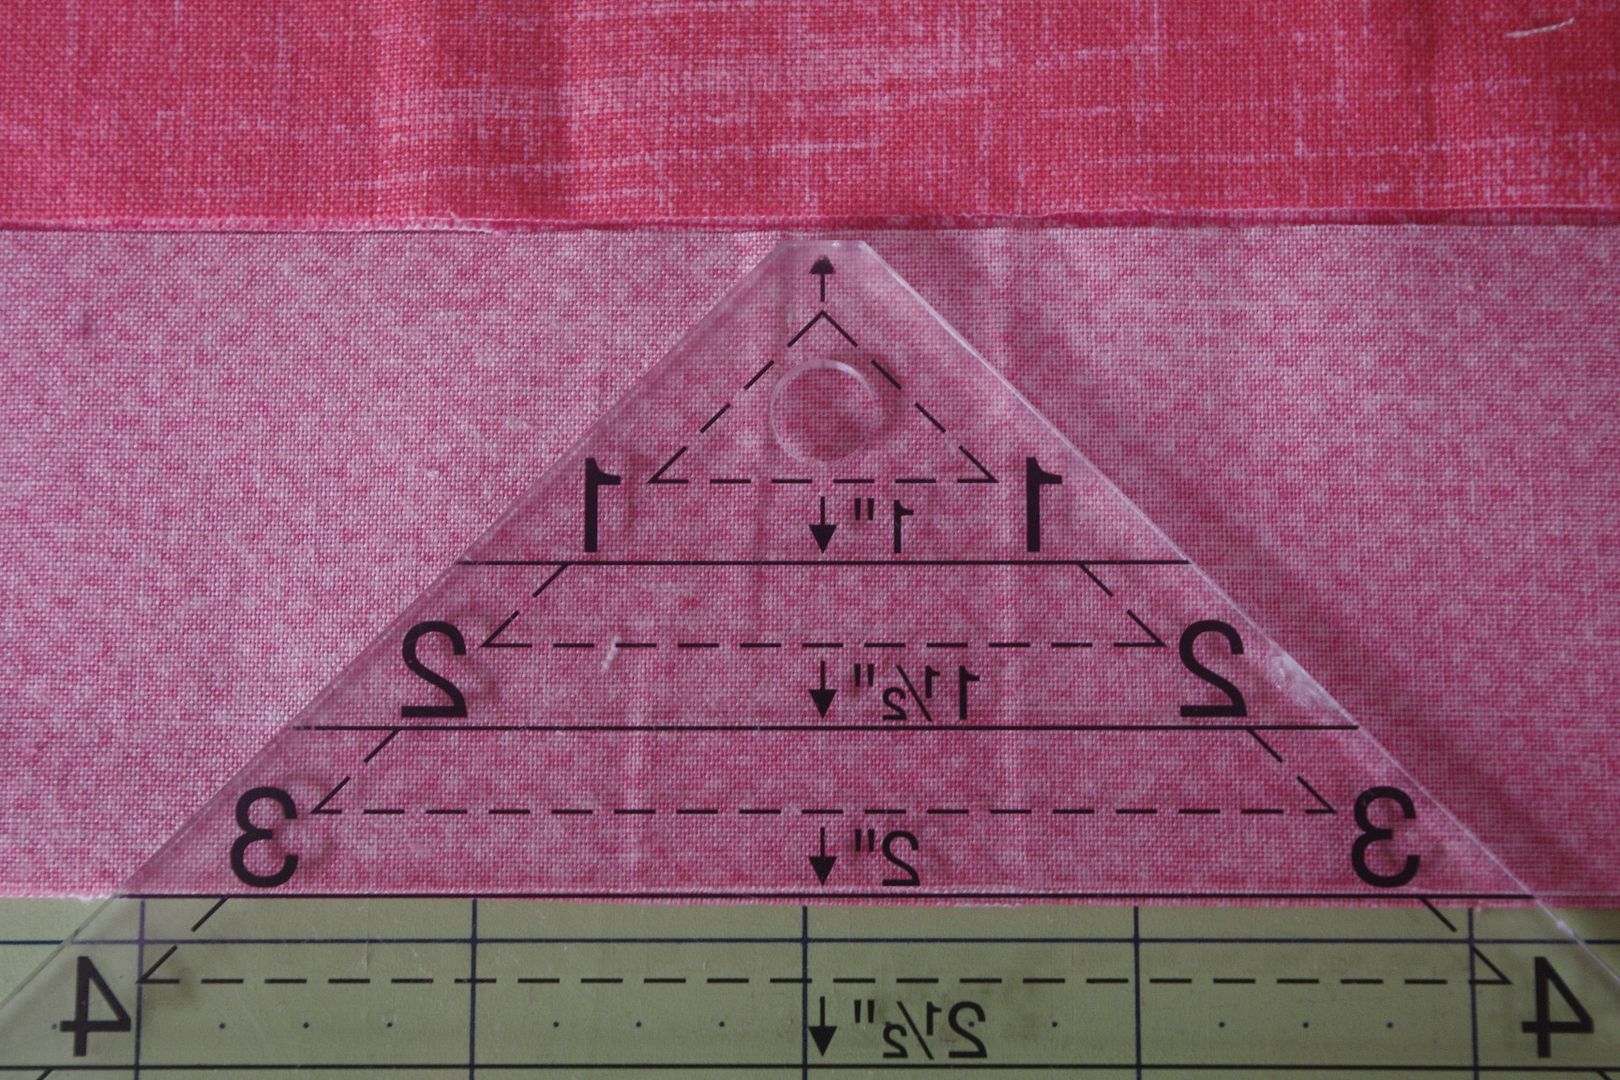
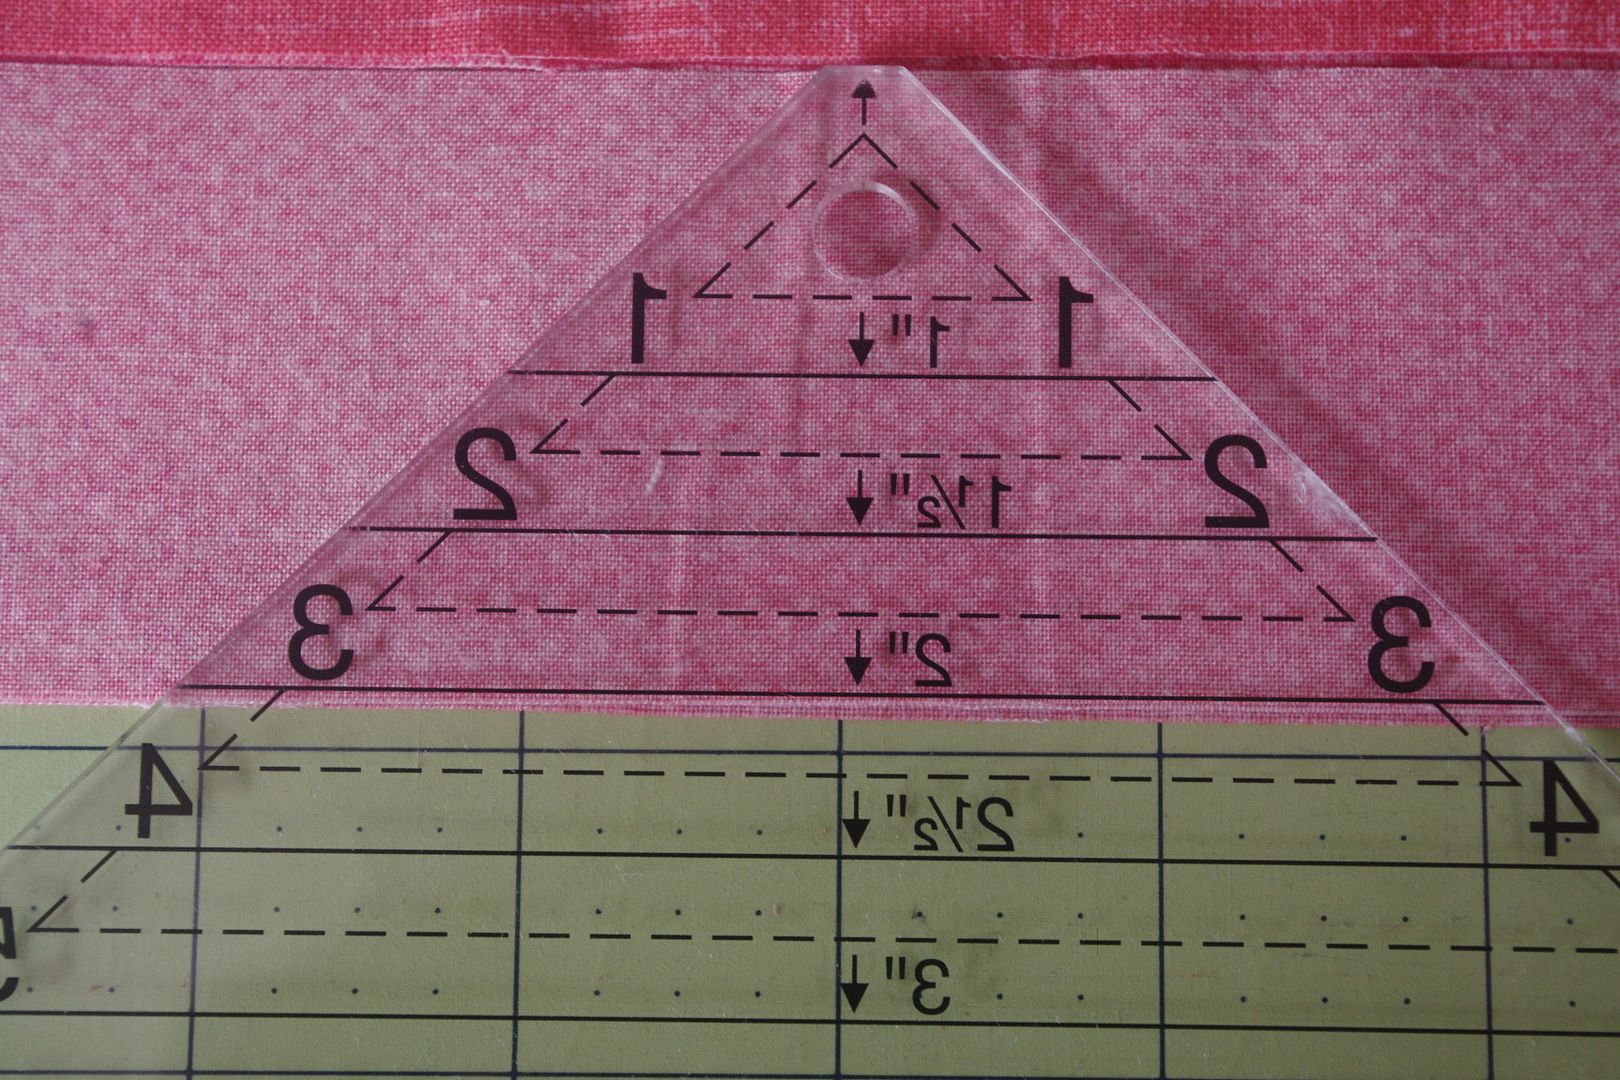
If you line the ruler up with the top when you cut, but line your triangles up with the bottom (corner where the backwards 3 is) when you sew . . . for me, it resulted it wider bottoms and not enough seam allowance above the point at the top. When I use the ruler, I have to keep reminding myself that I'm going to line up the bottom when I sew, so I need to line up the bottom when I cut.
I cut the strips, then use the Easy Angle to cut the point off.
Then I line up where the 5" is and cut the slant. Then I cut the point off and move on down until I've got the strip done. For this I have 6 layers. I don't go over 6 and prefer to keep it more around 4-5.
These were cut from FQ, so not real long. I did half right side up and half wrong side up, so I did not have to change the way I was laying my ruler.
When I'm cutting up the strips and need to have my ruler off the edge, I put the cut off pieces down so I can use them to rest the ruler. Since I hast three WOF groups (6 fabrics each) to cut up, I left them there from the first row until I was done.
Some mentioned having problems using the companion angle for the flying geese. On problem I had was wanting to line up the top instead of the bottom when cutting. The strips end up being a hair wider than 2", so you'll get a bit different bottom width depending on what you do.
Bottom lined up
If you line the ruler up with the top when you cut, but line your triangles up with the bottom (corner where the backwards 3 is) when you sew . . . for me, it resulted it wider bottoms and not enough seam allowance above the point at the top. When I use the ruler, I have to keep reminding myself that I'm going to line up the bottom when I sew, so I need to line up the bottom when I cut.
12-08-2017, 02:47 PM
#926
Super Member
Join Date: Sep 2014
Location: Rural Oklahoma
Posts: 5,374
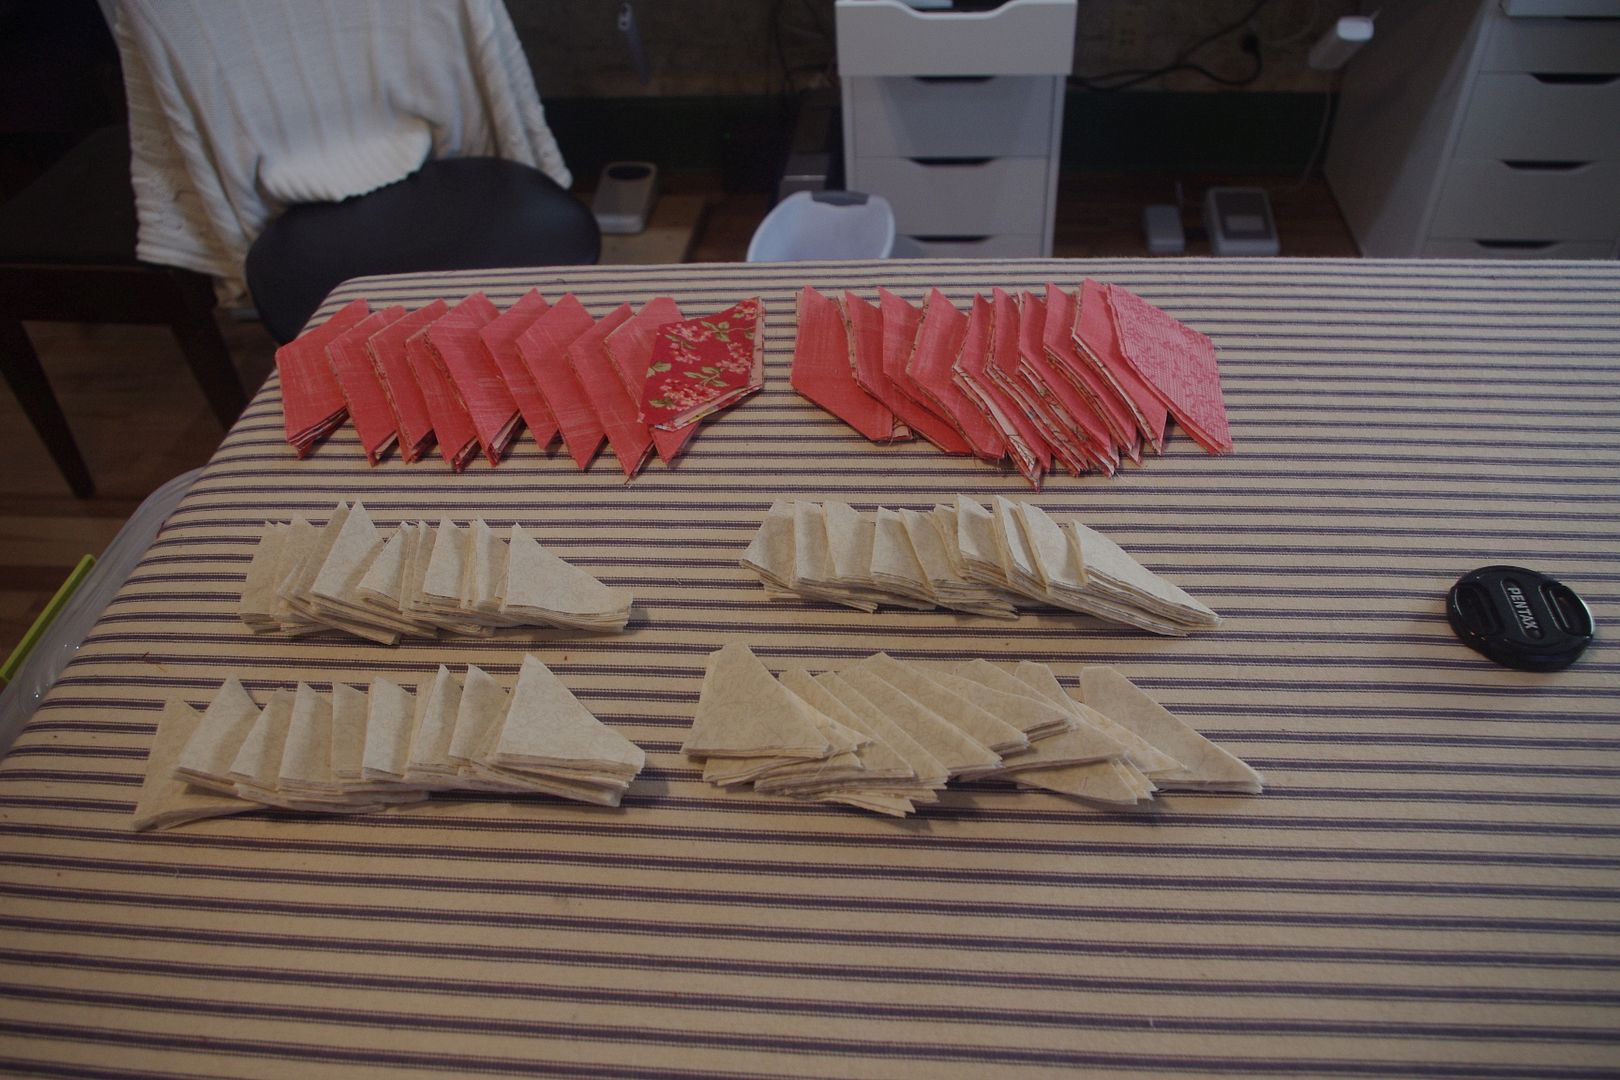
Here is a pic of all my units arranged (well a few of each of the units)
[ATTACH=CONFIG]584958[/ATTACH]
[ATTACH=CONFIG]584958[/ATTACH]
12-08-2017, 03:33 PM
#927
Super Member
Join Date: Apr 2011
Location: Wisconsin-Alabama Gulf Coast Snow Bird
Posts: 2,202
Looking good Kass!
Macybaby, great directions on how you got clue 3's units cut. One of your pictures showed the angle ruler and a light bulb went off in my head. I have "The Binding Tool", one of those rulers I just had to have when I started quilting. It never worked for me as a binding tool, but I may give it a whirl to see how it will work with the clue 3 units. Won't be able to try it until sometime on Sunday.
Jan
12-08-2017, 03:42 PM
#928
Super Member
Join Date: Aug 2011
Location: Asheville, previously Lake Vermilion, Tarpon Springs, Duluth, St Paul, Soudan
Posts: 1,651
Today was just a frustrating day. We were to have a holiday party for 136 people tomorrow, but Benji intervened. The winter storm warning won’t be finished until noon tomorrow and we have lots of mountains, so driving is hazardous, and people won’t leave their house if there will be an inch of snow. So about noon, we rescheduled for Thursday and told everyone.
The afternoon was filled with...why does it have to be Thursday? Can’t it be next Saturday? No, the only day the caterer and venue were both available until after New Year’s was Thursday. Well, I can’t come Thursday, when will my ticket be refunded? Or...I couldn’t come Saturday but I can come Thursday, so can I sign up now?
Left to go outside to shovel the first 6” of heart attack snow. Came back in to a call from my niece saying they had evacuated last night and DN was called out from Camp Pendelton to drop water. Put everything into perspective. Tomorrow I will shovel the next 6” unless it rains. And cut clue 3, And make more geese.
12-08-2017, 03:55 PM
#929
Senior Member
Join Date: May 2017
Location: Mount Pleasant, WI
Posts: 579
This is how I cut mine. I did a whole boatload of these for my ribbon quilt - so I've had quite a bit of practice already.
I cut the strips, then use the Easy Angle to cut the point off.
Then I line up where the 5" is and cut the slant. Then I cut the point off and move on down until I've got the strip done. For this I have 6 layers. I don't go over 6 and prefer to keep it more around 4-5.
These were cut from FQ, so not real long. I did half right side up and half wrong side up, so I did not have to change the way I was laying my ruler.
When I'm cutting up the strips and need to have my ruler off the edge, I put the cut off pieces down so I can use them to rest the ruler. Since I hast three WOF groups (6 fabrics each) to cut up, I left them there from the first row until I was done.
Some mentioned having problems using the companion angle for the flying geese. On problem I had was wanting to line up the top instead of the bottom when cutting. The strips end up being a hair wider than 2", so you'll get a bit different bottom width depending on what you do.
Bottom lined up
If you line the ruler up with the top when you cut, but line your triangles up with the bottom (corner where the backwards 3 is) when you sew . . . for me, it resulted it wider bottoms and not enough seam allowance above the point at the top. When I use the ruler, I have to keep reminding myself that I'm going to line up the bottom when I sew, so I need to line up the bottom when I cut.
12-08-2017, 04:01 PM
#930
Super Member
Thread Starter

Join Date: Aug 2016
Location: Kansas
Posts: 4,493
Cathy, thanks for the mini lesson! If you don't mind I might save them to my device for future tips?

Thread
Thread Starter
Forum
Replies
Last Post
Podunk Princess
QuiltingBoard Challenges & Contests
2033
01-11-2022 06:54 PM
