
My New Project - Refinishing my Antique Singer Cabinets
 12-02-2013, 10:29 PM
#1
Senior Member
Thread Starter
Join Date: Nov 2013
Location: SF Bay Area
Posts: 586
hi all,
this is what keeping me busy lately. trying to refinish my antique singer cabinets. i will update this forum on my progress. recently just removed the paint using Citristip on my 16-188 and 201-2 cabinets. Citristrip is a great product and it's environmentally friendly and safe for indoor use. my 201-2 cabinet took me 2 times of paint stripper. next is to use a denatured alcohol to clean it. and maybe a bit of sanding. anything i need to know? any advise? thanks a lot.
this is what keeping me busy lately. trying to refinish my antique singer cabinets. i will update this forum on my progress. recently just removed the paint using Citristip on my 16-188 and 201-2 cabinets. Citristrip is a great product and it's environmentally friendly and safe for indoor use. my 201-2 cabinet took me 2 times of paint stripper. next is to use a denatured alcohol to clean it. and maybe a bit of sanding. anything i need to know? any advise? thanks a lot.
 12-02-2013, 10:30 PM
#2
Senior Member
Thread Starter
Join Date: Nov 2013
Location: SF Bay Area
Posts: 586
Sorry guys for the mis-orientation. i have no idea why my Mac is doing this. i made sure that it is correctly oriented and yet this is what i got. This new MAC IOS is driving me nuts. let me see if i can orient it correctly but my apologies.
12-03-2013, 04:30 AM
#3
Super Member

Join Date: Jul 2013
Location: South Dakota
Posts: 8,152
I'd suggest taking the cabinet apart - you will get much better results in the end by doing that. Otherwise you'll end up with bits of old finish peaking through the cracks. This does not happen if you have a cabinet that was origiinally finished assembled - but that is not the case with this one.
BTW - you have a lot of cleanup to do before you even consider sanding - otherwise you'll end up with a very uneven surface and possibly sand right through the veneer.
This is the older style of your cabinet (this one is from early 1920's) - yours will come apart about the same.

Here is a neat way of dealing with having a lot of pieces - get some different height disposable cups, and you can layer your pieces for drying. This is my quilt frame.
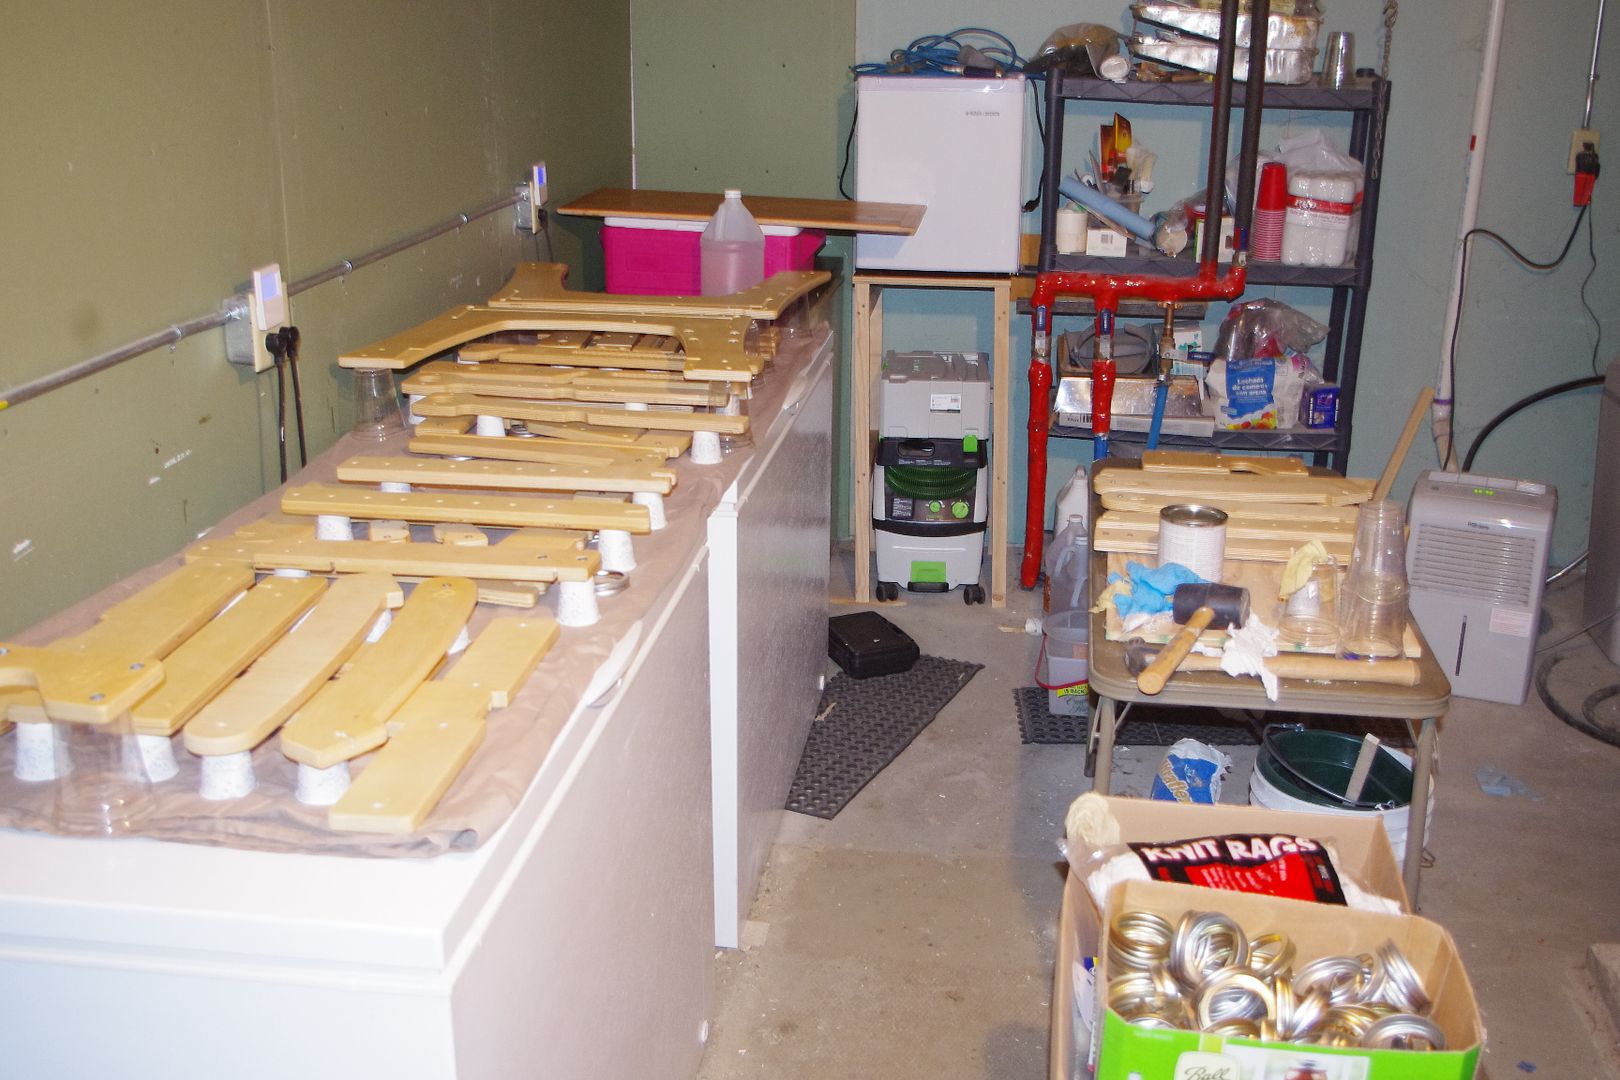
Canning jar lids make excellent woodworking "cookies" That is what I use for the bottom layer supports.
BTW - you have a lot of cleanup to do before you even consider sanding - otherwise you'll end up with a very uneven surface and possibly sand right through the veneer.
This is the older style of your cabinet (this one is from early 1920's) - yours will come apart about the same.
Here is a neat way of dealing with having a lot of pieces - get some different height disposable cups, and you can layer your pieces for drying. This is my quilt frame.
Canning jar lids make excellent woodworking "cookies" That is what I use for the bottom layer supports.
Last edited by Macybaby; 12-03-2013 at 04:34 AM.
12-03-2013, 06:10 AM
#4
Super Member

Join Date: May 2011
Location: Frederick, OK
Posts: 2,031
I�ll be watching with interest. I�ve got a Singer 31-15 top that I need to refinish, including some veneer reattachment. Either that, or veneer replacement. Mine has white paint overspray on it.
CD in Oklahoma
CD in Oklahoma
12-03-2013, 06:25 AM
#6
Super Member
Join Date: Jul 2013
Location: South Dakota
Posts: 8,152
I've got to get back to the one I started early summer. It's all stripped and ready for repair work before final sanding, staining and a new hand rubbed finish applied (I won't use poly on old furniture).
Since it turned cold, I brought all the pieces in from the shed - now they are down in the basement. I guess I've been playing with my attachments too much!
Since it turned cold, I brought all the pieces in from the shed - now they are down in the basement. I guess I've been playing with my attachments too much!
12-03-2013, 11:49 AM
#8
Senior Member
Thread Starter
Join Date: Nov 2013
Location: SF Bay Area
Posts: 586
i hear you. i was about to give up and just do a makeover black paint as the old varnish/stain was so bad and there are burned and water marks all over the wood but decided to do it on as a first diy refurnishing. a learning process as they say.
12-03-2013, 11:51 AM
#9
Senior Member
Thread Starter
Join Date: Nov 2013
Location: SF Bay Area
Posts: 586
wouldn't poly help protect the wood ? any reason why staining it is better? that was my thought also. i went back and forth at home depot deciding on whether to get Minwax stain or Minwax Polyshades (with poly). advise ?
yes. i plan on taking them apart. i tried to do the short cut thingy but not working out. it will be much harder getting into those grooves and bending and everything. thanks for the advise.
yes. i plan on taking them apart. i tried to do the short cut thingy but not working out. it will be much harder getting into those grooves and bending and everything. thanks for the advise.
Last edited by vmaniqui; 12-03-2013 at 12:10 PM.
12-03-2013, 01:12 PM
#10
Super Member
Join Date: Jul 2013
Location: South Dakota
Posts: 8,152
I never said I would not apply a finish - I just won't use Poly (short for polyurethane) on them. I have a very strong dislike for Polyshades - but I know some like it. To me it's the lazy man's way, and it does an OK job at staining and finishing, but not a good job of either. It looks pretty good in pictures over the internet . . .
For old stuff, I really like Minwax's Antique Oil - and I hand apply at least 4 coats. 6-7 is often better. Gives a deep luster without the "plastic" look of polyurethane. I've used Antique Oil on most of the wood stained trim in my house, but its' 130 years old and I wanted an older look to the finishes. It's held up very well, and you can easily apply another coat to freshen it up as it will soften and blend with the existing finish. For a harder surface, I'll use General Finishes Salad Bowl. I used that on my baking center countertops and table, and loved the way it turned out - and it's very durable.
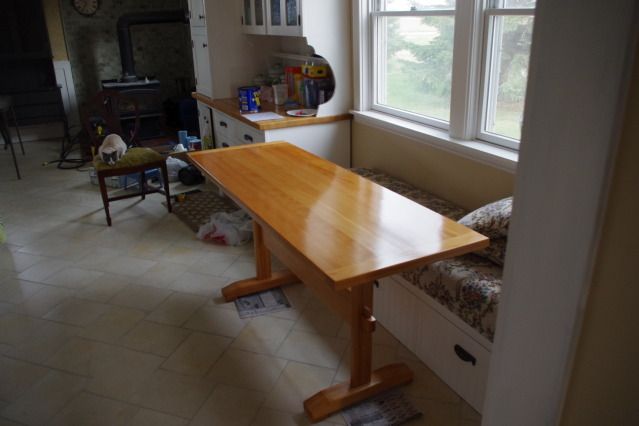
Polyurethane layers do not combine - each layer is separate - just sand through from one to the lower and see what kind of rings you can get! I find Poly rather unforgiving and a pain to work with - except you can get a durable finish with only one or two coats.
For old stuff, I really like Minwax's Antique Oil - and I hand apply at least 4 coats. 6-7 is often better. Gives a deep luster without the "plastic" look of polyurethane. I've used Antique Oil on most of the wood stained trim in my house, but its' 130 years old and I wanted an older look to the finishes. It's held up very well, and you can easily apply another coat to freshen it up as it will soften and blend with the existing finish. For a harder surface, I'll use General Finishes Salad Bowl. I used that on my baking center countertops and table, and loved the way it turned out - and it's very durable.
Polyurethane layers do not combine - each layer is separate - just sand through from one to the lower and see what kind of rings you can get! I find Poly rather unforgiving and a pain to work with - except you can get a durable finish with only one or two coats.

Thread
Thread Starter
Forum
Replies
Last Post
Glenn
For Vintage & Antique Machine Enthusiasts
160
09-03-2020 02:39 AM
vmaniqui
For Vintage & Antique Machine Enthusiasts
12
02-11-2014 02:04 AM
Vridar
For Vintage & Antique Machine Enthusiasts
13
10-07-2013 04:50 AM
jljack
For Vintage & Antique Machine Enthusiasts
46
11-06-2012 10:38 AM
Pinkiris
General Chit-Chat (non-quilting talk)
8
09-21-2011 05:29 PM
